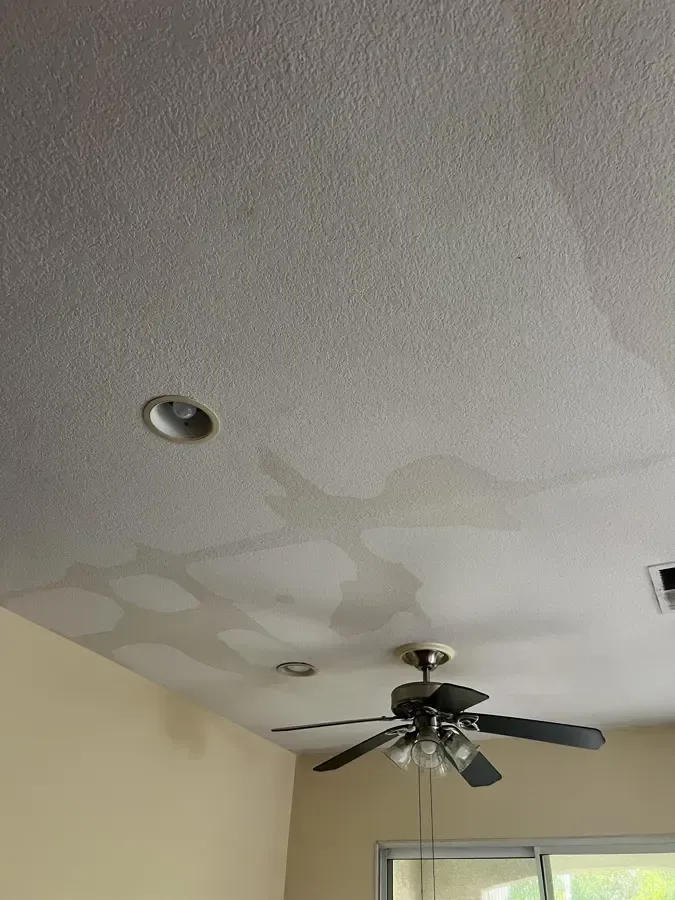
August 24, 2020: A microburst caused especially heavy damage in Greenwood. For a Wakefield homeowner facing a later wind and rain event, a new ceiling stain calls for an overhead inspection that connects the roof opening, attic materials and occupied rooms below before finish repairs begin.
Key takeaways
- A growing ceiling bulge requires a clear exclusion area beneath it.
- Roof repair and interior moisture removal should be coordinated as separate parts of the recovery.
- The attic inspection follows wet framing and insulation away from the visible drip.
- Photographs taken before removal preserve the relationship between the roof entry and the damaged room.
- Painting waits until the source is controlled and retained ceiling materials meet the drying plan.
Use the storm sequence to focus the inspection
Wind can change where rain enters a building, and the indoor symptom may appear after the strongest weather has passed. The owner records when dripping began, which room showed it first and whether the mark enlarged with another shower, giving the roof and restoration teams a shared sequence to investigate.
The Greenwood microburst provides a dated local example of severe wind damage. For the current building, the roofer inspects the actual covering, penetrations and exposed roof details while the interior technician follows moisture through the attic, keeping both sets of findings connected to the room below.
Roof leak water damage assessment should include the path between the roof entry and the ceiling mark. Water can travel along a framing member or collect above insulation before it becomes visible, so the stain location is a starting point for inspection.
- Record the weather conditions when indoor dripping was noticed.
- Photograph the ceiling from a safe position outside the damaged area.
- Identify whether an attic opening can be approached without crossing wet flooring.
- Keep the roofer informed when another room develops a fresh mark.
Protect the space beneath a wet ceiling
A sagging section, loose ceiling finish or water near a light fitting changes how the room can be used. People and pets should remain outside the affected footprint while qualified personnel assess overhead stability and electrical conditions, with furniture moved only when a safe approach has been established.
A bucket placed beneath a drip may catch liquid but leaves the overhead assembly unchanged. Puncturing or pulling at a swollen ceiling from below can release water and loose material unpredictably, so controlled access belongs in the work plan with a clear area for removal and protection of adjacent finishes.
The room layout matters when the wet section sits above a hallway or the only practical route to another space. An alternative passage, temporary room closure and a dry place for belongings should be arranged before equipment arrives, reducing repeated movement through the area under inspection.
- Mark the boundary of the room area that remains closed.
- Keep ladders and stored items out of the protected passage.
- Leave affected switches and light fixtures alone until assessed.
- Separate dry furnishings from items already exposed to dripping water.
Inspect insulation as part of the water route
Attic insulation can conceal the framing surface beneath it and retain water above the ceiling. The technician identifies the insulation type and condition, checks accessible backing and records the extent of wetting before deciding which materials can remain and which need removal to expose the assembly.
A roof opening above one area may send water toward a lower point before it drips into a room. Inspection therefore follows connected framing, ceiling penetrations and changes in the attic floor, with care around unsupported surfaces and any electrical components inside the affected space.
Where water has reached an occupied floor, water extraction can proceed once access is safe. That work is coordinated with overhead removal so equipment and finished belongings do not sit beneath an area scheduled to be opened for trapped moisture.
- Label the attic side and room side of matching wet locations.
- Photograph wet insulation before bagging or removal.
- Note concealed sections that need additional access.
- Keep removed attic material from passing through clean rooms unprotected.
Arrange roof work without closing wet cavities
Stopping new rain entry gives the interior drying team a stable starting point. The roofer should communicate what was repaired, any temporary protection still in place and any roof area requiring follow up, allowing the restoration team to distinguish continuing entry from moisture already held in building materials.
Interior access may need to remain open while that moisture is measured and removed. Replacing ceiling board immediately after exterior repair can conceal damp framing or backing, so enclosure is scheduled around the retained materials and the access needed to assess their progress.
Cold, snowy winters and cool, rainy springs characterize the local climate. A practical handoff accounts for weather exposure during repair and gives occupants a clear way to report renewed dripping, while the project record identifies the exact location and timing of any recurrence.
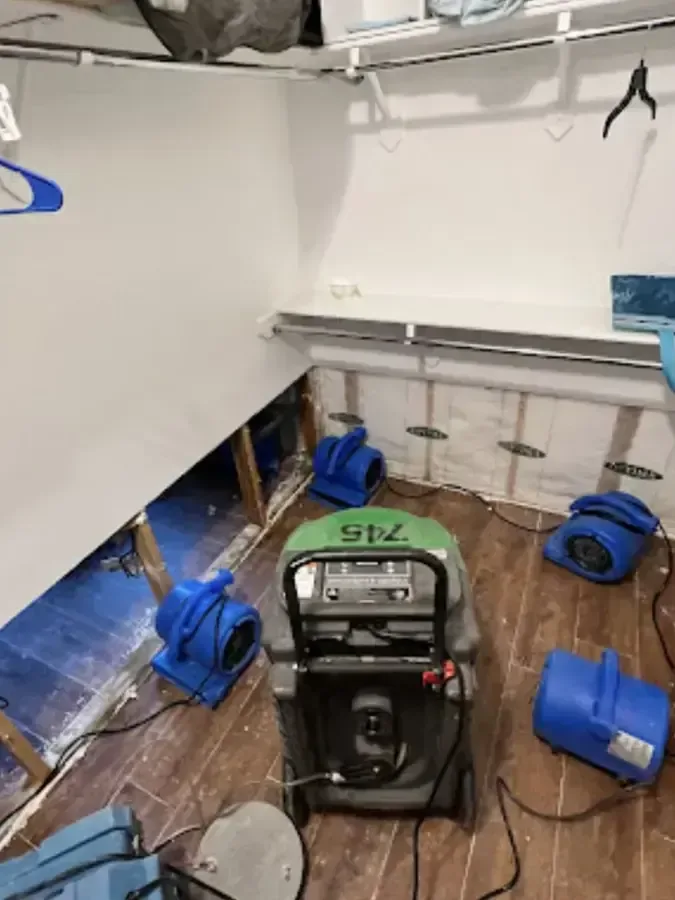
Dry the assembly above the finished surface
The visible ceiling surface is only part of the overhead assembly. Framing, backing and the adjoining wall top may respond differently to drying, so the technician selects measurement points that represent those materials and checks whether airflow actually reaches the surfaces intended to remain.
Structural drying uses that material map to place and adjust equipment. When a concealed corner remains damp, the next decision may involve changing access, evaluating retained insulation or redirecting airflow, with the change documented against the earlier reading at that location.
A clean looking ceiling opening should stay identifiable throughout the project. Photographs that include an adjacent doorway or wall corner help the repair contractor match drying records to the correct room position, especially when several similar sections were opened after the same roof leak.
- Keep moisture locations recognizable after damaged finishes are removed.
- Record observations at wall tops adjoining the wet ceiling.
- Document the purpose of any additional access opening.
- Review the retained assembly before arranging ceiling closure.
Prepare the room for repair and everyday use
The finishing contractor needs a concise description of the remaining work: ceiling replacement, trim repairs, surface preparation and any electrical tasks still awaiting completion. The owner should receive that list with the roof repair record and the interior drying results so responsibility for each item stays clear.
Contents return to their usual positions after the work area is safe and the required access is no longer needed. Keeping a dry storage area available during the final inspection makes it easier to check wall edges and floor transitions that were hidden by furniture before the water loss.
The completed file should show the original overhead condition, the exposed assembly and the final state before enclosure. That progression explains why a particular opening was made and what changed during drying, providing a useful reference if a mark later appears in the same room.
Questions
Can the ceiling stain be directly below the roof opening?
It can, but the inspection also checks adjoining framing and concealed surfaces for traveled water. Matching observations above and below the ceiling helps locate the complete wet area.
Should furniture be moved from beneath a sagging section?
Access must be assessed before anyone enters beneath unstable material. The response team can establish a safe removal route and decide whether overhead protection or controlled ceiling removal needs to happen first.
What should the roof contractor tell the drying team?
The handoff should identify the repaired entry point, the nature of any temporary protection and any remaining exposure. That information helps interpret a later moisture change inside the attic.
When is painting appropriate after a roof leak?
Painting follows completion of the source repair and assessment of the retained ceiling assembly. Damaged finishes also need the specified preparation or replacement before a new coating is applied.